This section provides a quick guide on how to start using ClassView, including joining options and in-call functions available.
Joining a call?
-
For optimal performance, we recommend installing our Windows Desktop app, which is compatible with Windows 10 version 14316.0 or higher.
-
If you are using a Mac, we recommend joining through your browser.
-
When invited to a ClassView session, you will receive an email invite with the joining details.
-
After clicking on the invitation link, you will have the choice to join using the Windows desktop app or through your browser.
Joining Options
-
Windows Desktop app (recommended)
-
Joining over the browser?
Creating your account and registering as a user
- Joining a call as a Guest?
If you have received an invitation to join a ClassView Session as a guest, there is no need to register, simply click on the link provided in the invitation email.
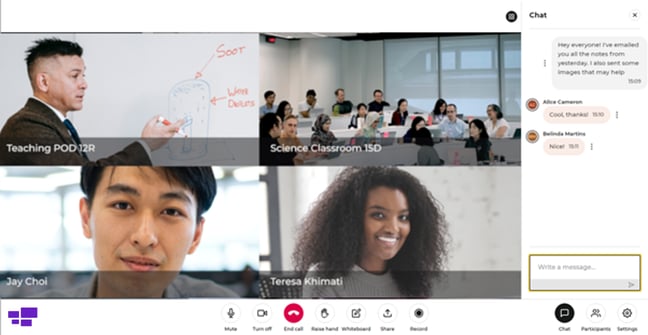
The ClassView In-Call Tool bar - Set up your ClassView Account?
Refer to the guide below for assistance. The individual who creates the ClassView account will become the account Administrator, responsible for approving any new users that join the account.
Create a new Organisation and register as a new user
How to join ClassView as a new User
ClassView Dashboard
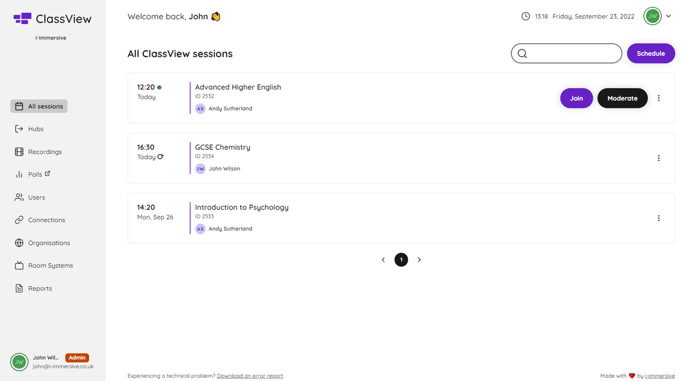
Once logged into ClassView you can view your own personal Dashboard of upcoming ClassView Sessions, amend any scheduled sessions, as well as moderate any session you are invited as moderator or account Admins can moderate any session.
-
Explore the details of all upcoming ClassView Sessions, easily search for sessions by name or Session ID.
-
The ClassView session organiser, Moderator, or Account Admin have the ability to edit or cancel ClassView Sessions.
Schedule a ClassView Session
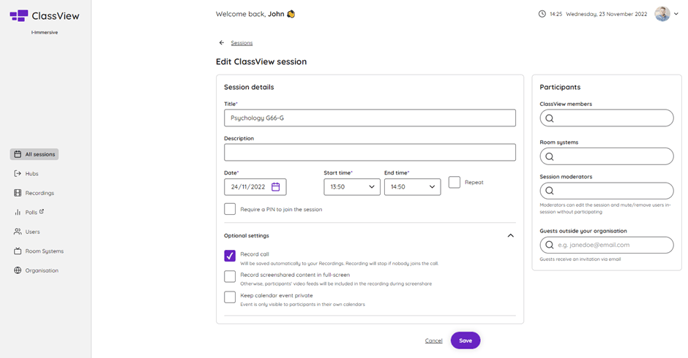
Scheduled sessions can be prearranged and set to recur throughout the year. You have the option to set up your sessions to start automatically, connecting to your Immersive Classrooms and enabling recording if needed, along with selecting your preferred security level to join your session.
-
Users have the flexibility to schedule ClassView Sessions well in advance, ranging from days to years, and can also set sessions to repeat at specified intervals.
-
Personalise your session by customising the title, setting the time and date, and providing a description. This information will be displayed in the invitee's calendar as the title and description of the meeting.
-
Select Optional Settings; Record all video and audio or only shared content only, as well as add a pin or set your invite to private for added security.
-
For more information on Optional Settings and how to use them check out our guide below.
How to schedule a session in ClassView
Hubs
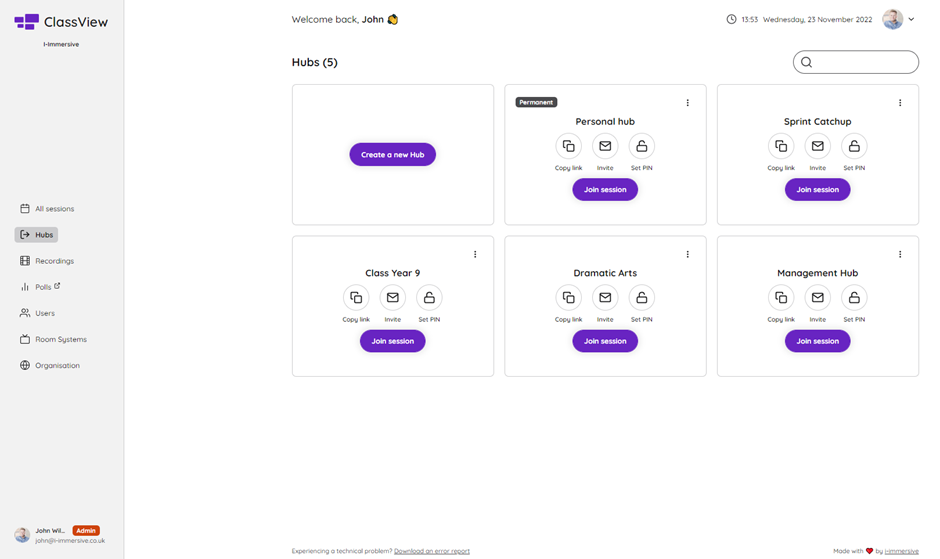
Hubs are static meeting spaces where you can instantly join and host sessions. You can email invite others to join a Hub as well as dial-out to room systems.
For a full overview of all the features and settings available, read the complete guide.
Recording a ClassView Session
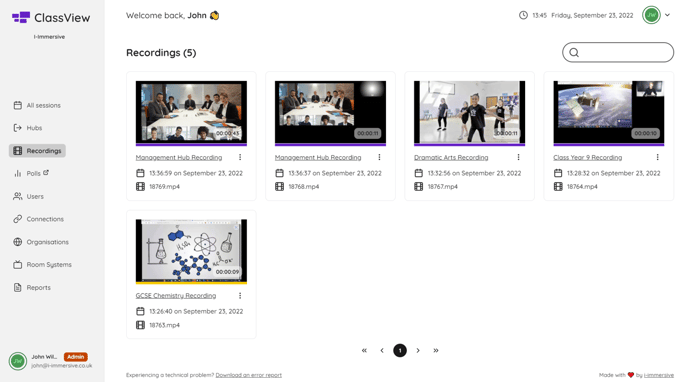
Recording can be set up either when scheduling your ClassView session or initiated and terminated at any point during a live scheduled session or Hub instant call. All participants will be notified when recording has been enabled.
- Access Recordings by clicking on the left panel to view your recordings.
- Recordings can be downloaded and shared instantly after your ClassView Session has ended.
How to Schedule a ClassView session
Live Chat
- Messages in the chat can be removed by the session owner, moderator, or admin while the call is ongoing.
Contact support
Contact our dedicated and experienced support team for any ClassView related support enquiries.
Call support: 0330 053 1700
Email: support@classview.com
